


 Login Status
How To Install Your Do It Yourself Backyard Putting Green Kit...
Installing A Quality Putting Green From Turf Avenue doesn't require you to have a green thumb. You don't have to be a greens-keeper or have special equipment. Most of the tools required for the putting green installation process you probably already own. And the ones you don't have you can find at a local rental company. So what are you waiting for?
Tools Needed
1. Shovels, rakes, hoe, hammer
2. Tiller or sod cutter
3. Sod roller and hand tamper
4. Plate tamper or roller -
compactor
5. Chalk-line and spray marking paint
6. Razor
knife or carpet knife and Scissors
7. Stiff push-broom (infill)
8. Drop spreader (infill)
Other Products Needed
1. Seam tape 12” to 18” landscape fabric
2. Commercial turf
adhesive (or PL Premium)
3. Fine washed dry sand (infill)
4.
Landscape spikes 4" to 6"
5. Nailer board (if needed)
6.
Boarder or boarder gravel
Installation Steps
Step 1: Determine Placement
Of Your
Green
Step 2: Remove Sod/Debris
Step 3: Prepare
The Ground
Step 4: Add
The Border
Step 5: Add
The Base Material
Step 6:
Compacting The Base
Step 7: Installing
The Cups
Step 8:
Finishing The Base
Step 9: Joining Rolls Together (part 1)
Step 10: Cutting
The Rolls
Step 11: Add Seaming Tape
And
Adhesive
Step 12: Joining Rolls Together (part2)
Step 13:
Shaping Your Green
Step 14: Adding Fringe Turf
Step 15:
Infilling The Green
Step 16: Infilling
The Fringe
Step 17:
Sweeping In Infill
Step 18: Cutting Holes
For The Cups
Step
19: Rolling The Green (For 1 Inch Turf Only)
Step
20: Seam Adhesive Instructions (Manufacturer)
Please Call With Any Questions That You Might Have...
(573)475-9547

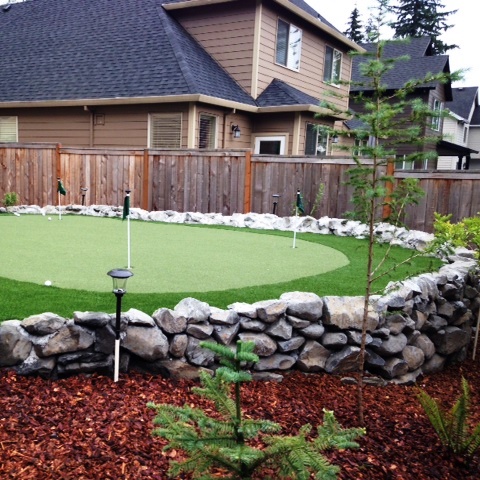
Step 1:
Decide On The
Placement Of Your Green...
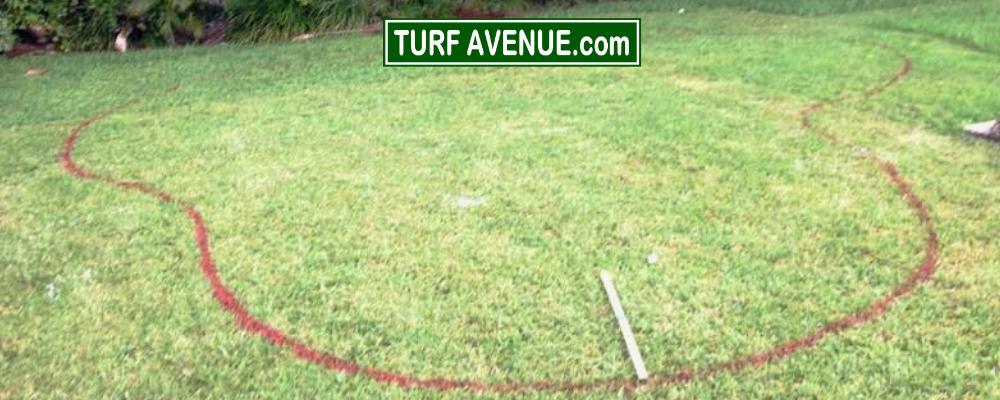
Check out placements in level areas of your property.
Take a
string, garden hose, or extension cord and lay it in the general
area and shape you desire. The width of our turf is15 feet so
you will need to think in widths of 15 feet when designing
your green (15, 30 feet wide) unless you plan on cutting
and seaming the rolls (if this is your intentions please see steps
9-12 first). The turf can later be cut to any length although it is
sold in 5 foot increments. By marking the area like this you will be
able to actually see the size and shape.
Refer to your diagrams
in your brochure to help determine a size and shape.
Once you see
the size and shape make sure to practice your golf game a little.
You may decide you need a larger green.
Use spray paint to mark
the entire outside perimeter of the shape. This marked edge will be
used as a reference point where your sub base material will be
placed.
Be sure your green is accessible from other areas of the
yard by chipping and pitching to the marked area.
![]()
Step 2:
Remove The Sod...
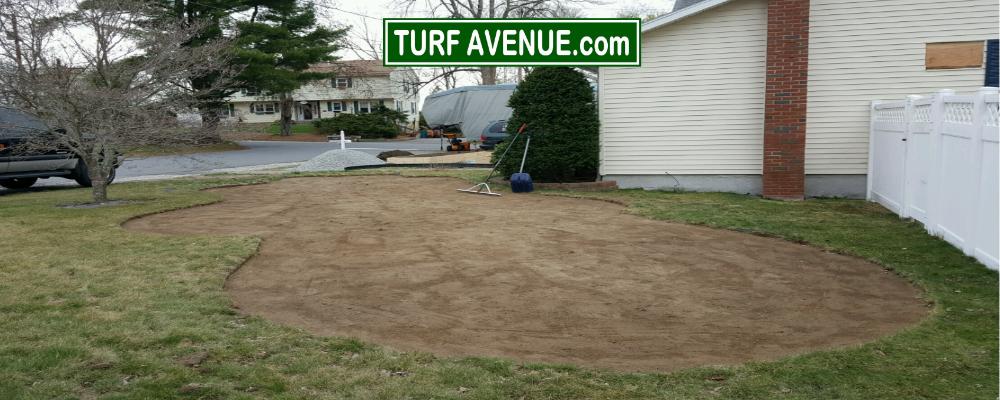
Whether you are doing an in-ground or an above ground installation
use a sod cutter or shovel to remove the grass in the area you have
marked with spray paint.
Remove any loose debris after the sod
has been taken out.
![]()
Step 3:
Prepare The Ground...
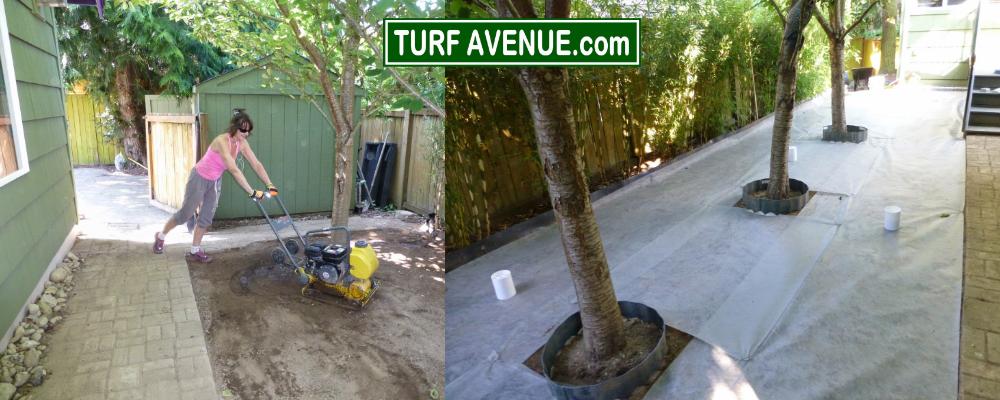
Compact the bare ground using your plate compactor to ensure a solid
foundation for the crushed stone base.
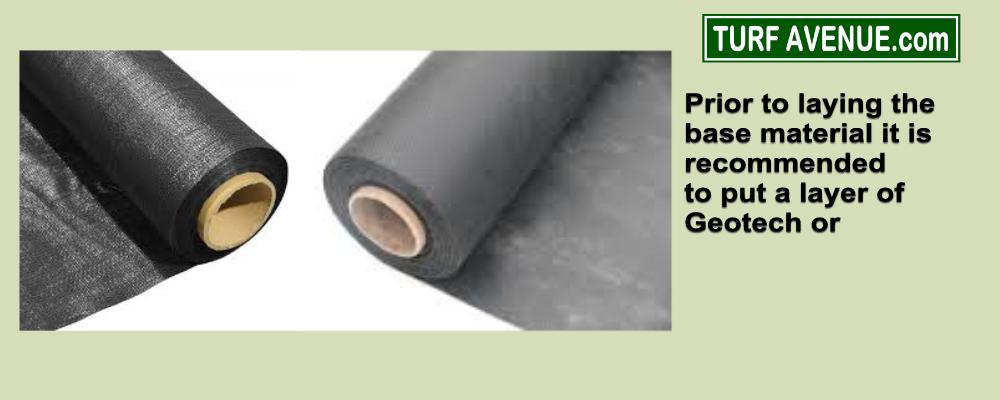
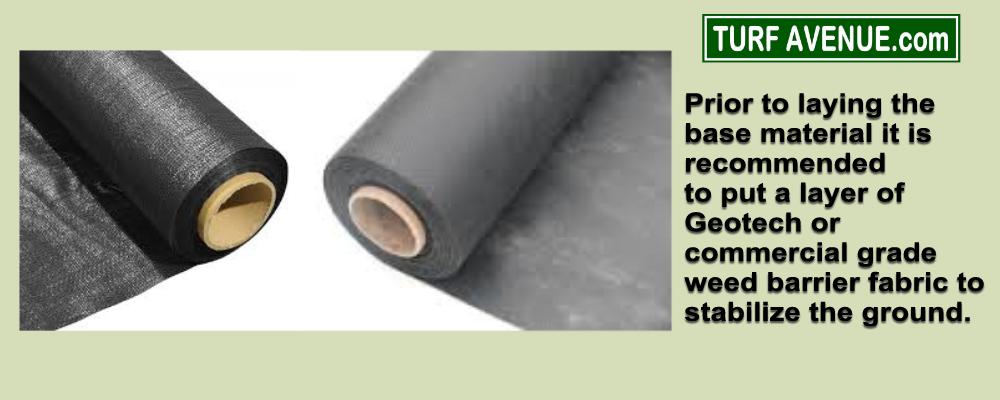
Lay out the weed barrier
on top of the ground in the area where the green will be installed.
The weed barrier acts as a stabilization cloth and does not allow
the crush stone sub base material to sink into the ground.
![]()
Step 4:
Add A Border...
Leave enough room on the inside for your basic material plus a half
inch or less for the putting green surface...
Add an edging as a
border along the entire outside perimeter of the area where your
stone base material will go. This will ensure the base material will
stay in the marked area and will not be pushed out beyond your area
when compacting the base. If you are using a block border or
retaining wall then the weight of the block will hold the base in
place.
Please Call With Any Questions That You Might Have... (573)475-9547
![]()
Step 5:
Add The Base Material...
The base is just that, It is the foundation of your new golf tool...
The more time that is spent perfecting the surface of your base
material, the better the surface of your green will be. One of the
tricks that we use in the field is taking a bright colored tennis
ball, and rolling across the surface - watching it carefully. If it
bounces cross the surface you'll see that that area is not smooth
enough. It is also recommended that you take the string long enough
to go from one end to the other. Stretch it tight so you can see if
you have high spots or low spots that need your attention. Repeat
this in several different angles across your base are.
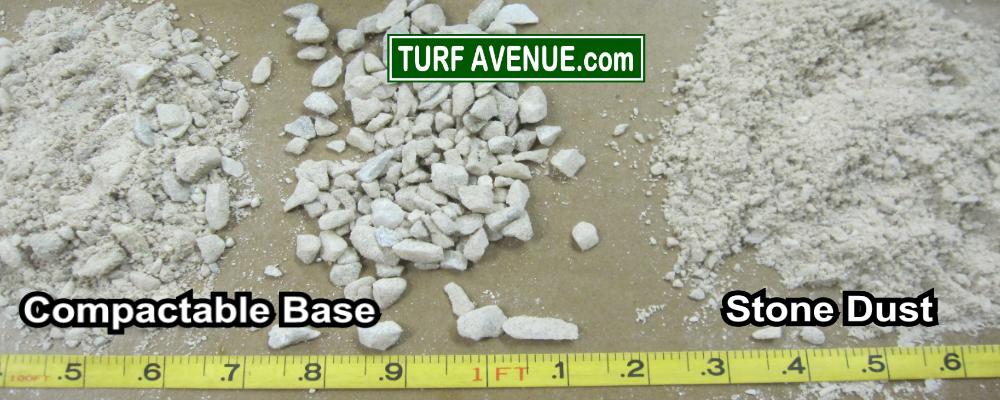
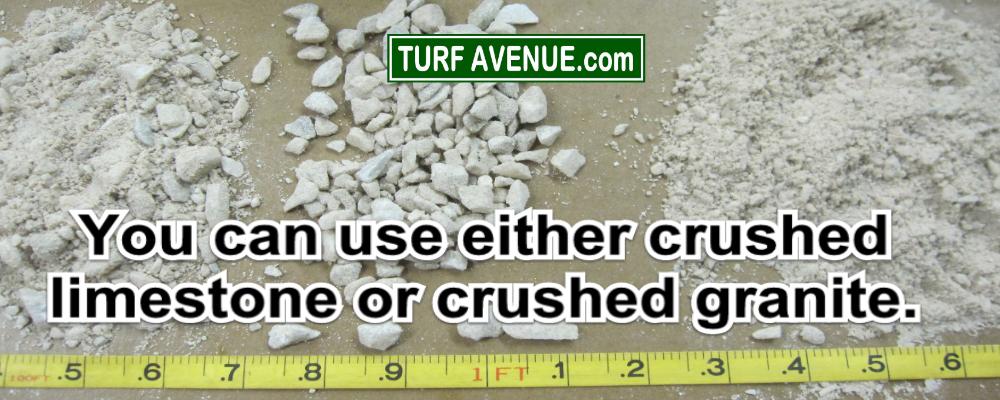
The basic
material should be crushed rock that will compact. Depending on the
area of the country you're located in, there will be different
materials available (3/8 minus crusher fines, # 8 crushed limestone,
3/8 road base , or crushed granet).
You can also do your basement
material in two layers. The first layer is a road base material that
consists of gravel stone approximately 3.5" or more. The second and
top layer consists of stone dust, #7 limestone dust, crusher fines
or rock dust, as it is commonly referred to. 1.5 to 1.9 tons / 100
Sq. Ft. (roughly 3in. in depth.
Make sure to distribute the sub
base material evenly. Work with a yard rake spread out the sub base
material so that it is consistently flat. Use a shovel to move the
large amounts of sub base material and the flat side of a rack to
smooth out any rough areas of the sub base.
Drainage will come
off the top of the green, not through the green. Drainage through
the green would eventually deteriorate the packed sub base. There
must be a slight slope to the sub base for proper water drainage. A
good rule of thumb is a 1 inch drop for every 10 to 12 feet in
length.
![]()
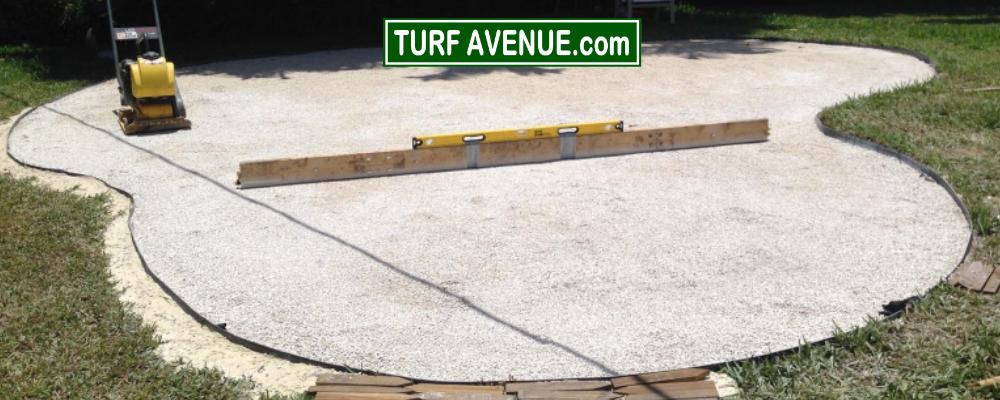
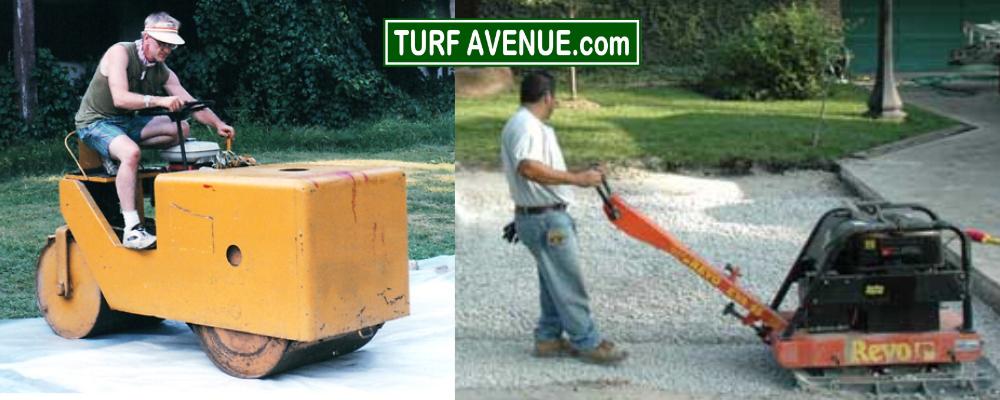
Step 6:
Compact The Sub Base...
It's a good idea to keep spraying water to dampen the surface while
you are tamping...
If you do not compact the sub base material
properly it will eventually settle in a way that will cause
irregularities in the surface of your putting green. These
irregularities adversely affect the roll of your ball when putting.
Remember that the plate compactor can be rented from any local
rental facility.
With your garden hose’s spray nozzle wet the
sub base lightly. Do Not saturate it.
Now compact the sub base.
To ensure good solid compaction, make sure to compact the sub base
several times the length and width of the area.
If there are any
small bumps, ridges, or irregular dips remaining smooth them out
with your rack or shovel. Use a 2 x 4 to screed or level the base
material. You may notice low spots or dips on your base. Chances are
that you have a low spot on the sub base that needs to be filled.
Your main goal is to keep the surface consistently flat, smooth
and solid.
Adding undulations or contours is easy.
Add
additional base material to that area.
Shape it with your rake
until you have the desired contour and undulation.
Compact that
area with your plate compactor. Understand a 1 inch rise over 10 to
12 feet will add a lot of contour once the putting green is added.
The putting green turf is designed to fit like a glove to the
surface. If you add too much slope to your sub base material the
ball will roll very fast and may roll off your green.
A good
basic guideline is for every 10 to 12 ft in the length of your sub
base you will drop the slope 1 to 4 inch.
To determine whether
you have enough or too much slope or contour-- after the sub base
material is completely compacted take a golf ball and putt on the
sub base.
The ball will break the same on the sub base as it
will when you install the putting green. Your sub base should be a
minimum depth of 4 inches when compaction is complete.
Make sure
the sub base is the way you want it. If you want to add or take away
extra slopes or contours now is the time to do it. However, if you
make any changes to the sub base then you must re-compact the sub
base after the changes are made. Once the putting green and the
infill is added it is difficult to adjust the contours of the sub
base.
Please Call With Any Questions That You Might Have... (573)475-9547
![]()
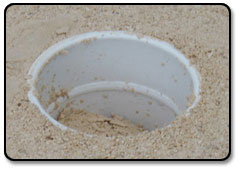
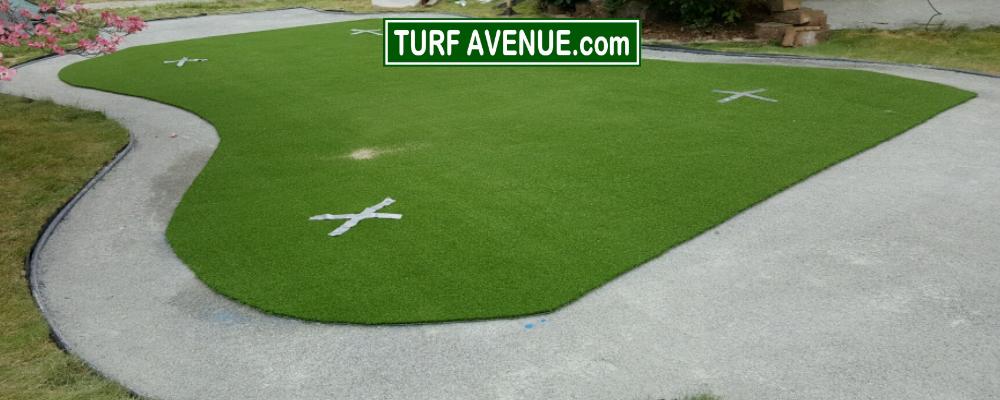
Step 7:
Install The Cups...
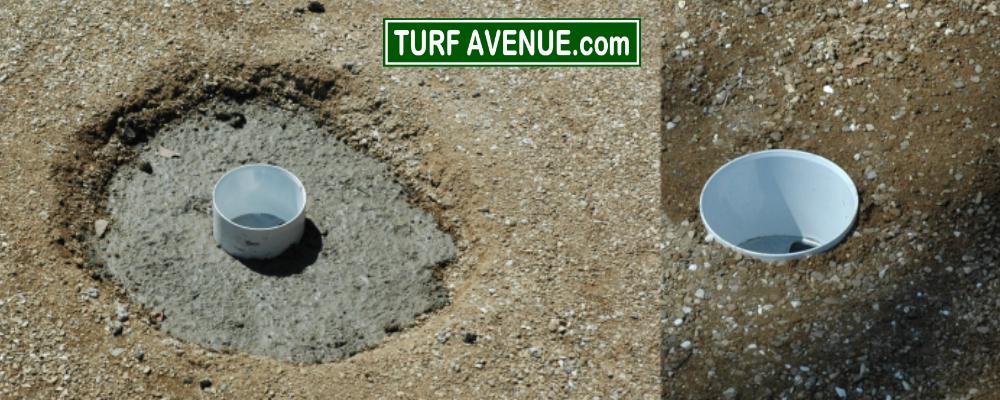
Arrange the cups on the sub base.
Mark the place where the cup
will be permanently placed. This can be done by applying pressure to
each cup and rotating it and will cause a small indentation in the
sub base that will be used as a marker or reference point.
Using
a small hand shovel dig a hole that is at least 4 inch larger around
than the cup itself
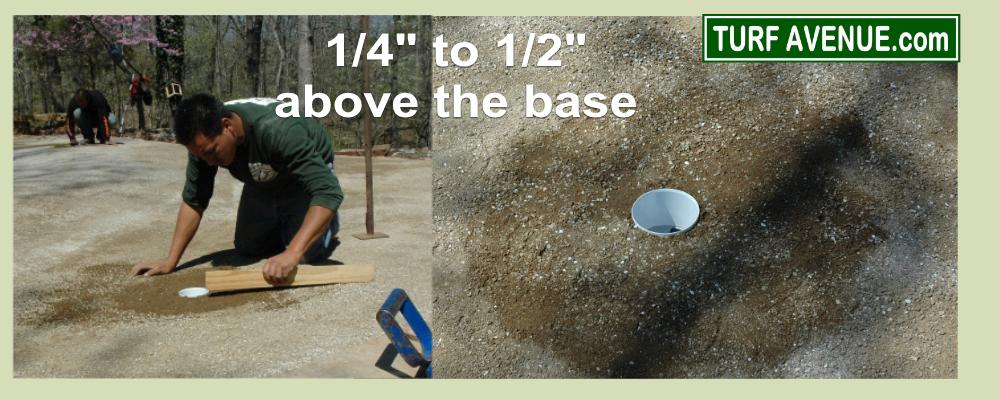
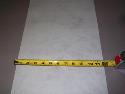
Because your cups are 6 inches tall you need
to make your hole 6 inches + in depth. The cups once placed in the
holes should be one quarter inch above the top of the sub base
material. Don’t worry if you go deeper because you can always back
fill the hole with the base.
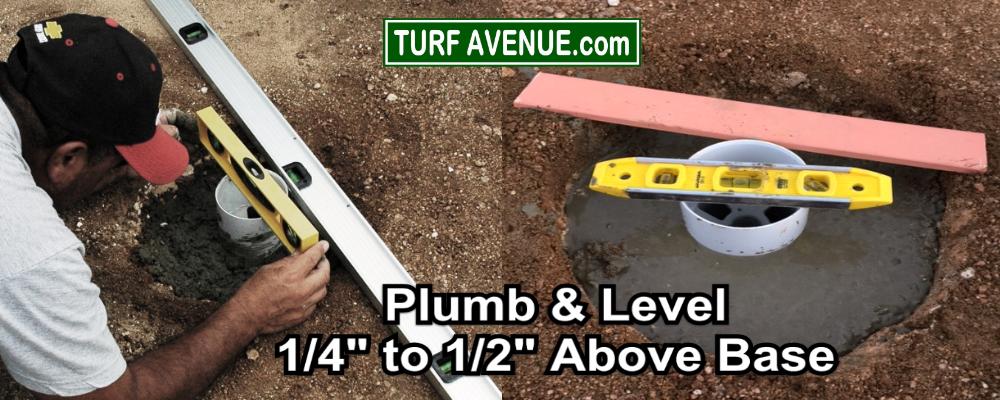
1/4'' to 1/2" above base.
 too
low
too
low 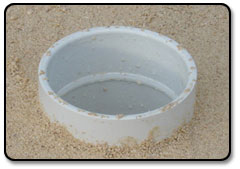 too high
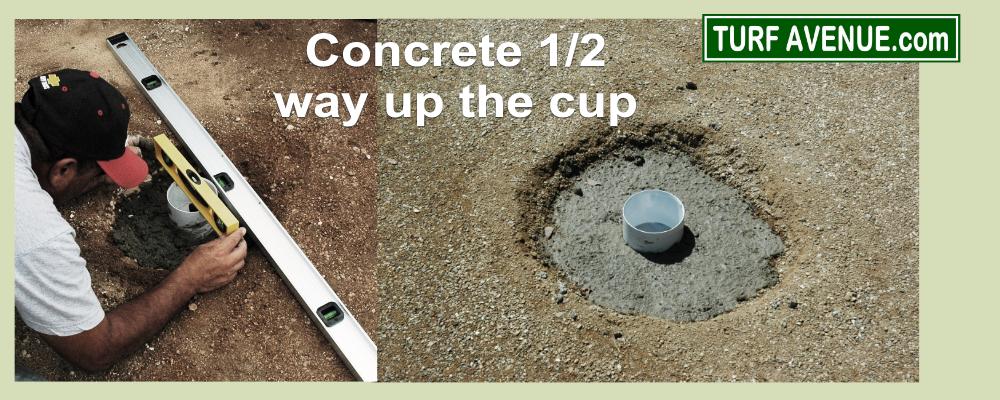
Add ready mix concrete around the cup & about
halfway up the outside of the cup.
Next, add sub-base around the
exposed perimeter of the cup.
Compact the sub-base around each
cup by hand tamping or running the compactor around the cup keeping
the cup 1/2" to 1/4" above the base. (You can always
tap it down a little bit but it's next to impossible to bring it
back up)
Continue to do each hole in the same manner.
![]()
Step 8:
Finish The Base...
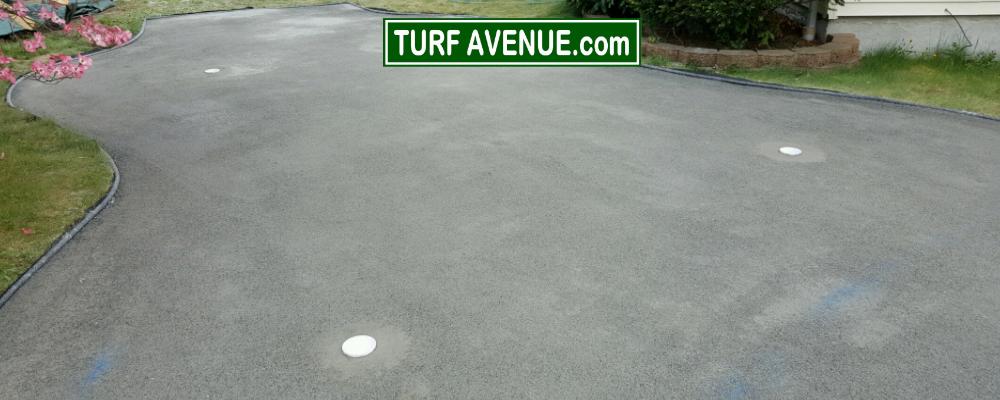
You might notice small ridges caused from the plate compactor, on
your finalized compacted base. These ridges must be removed. The
putting green turf will fit like glove to your base so you want the
base to be as smooth as possible.
Use the bottom of a shovel or
hand tamp to flatten the ridges.
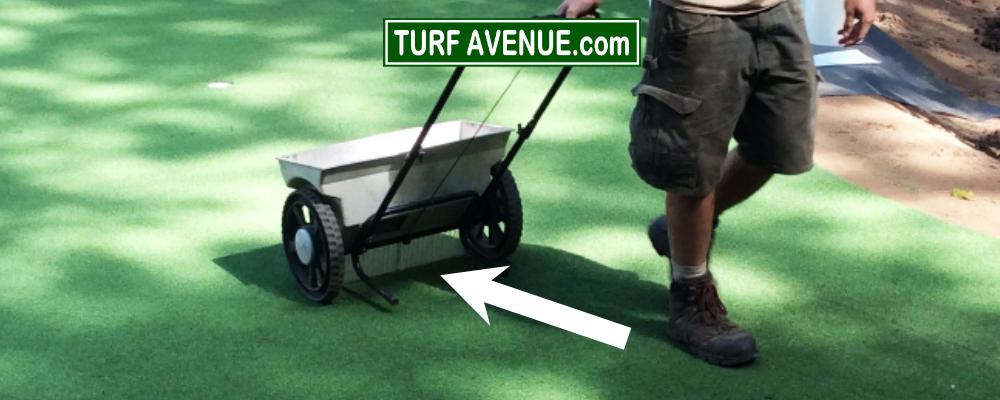
Use the drop spreader to
distribute the commercial grade medium sand over the entire base. A
50 pound bag of sand will cover a 15 x 30 area. Just To Fill In
Little Inperfection...
Use a medium bristle push broom to lightly
sweep the sand and any loose gravel off your base. This will fill in
any cracks and crevasses and give you a super smooth base.
If
using the standard 15 ft. wide measurement for your green then you
may omit steps 9-12.
![]()
Step 9:
Join Rolls Together (part 1 -
Dry fit)...
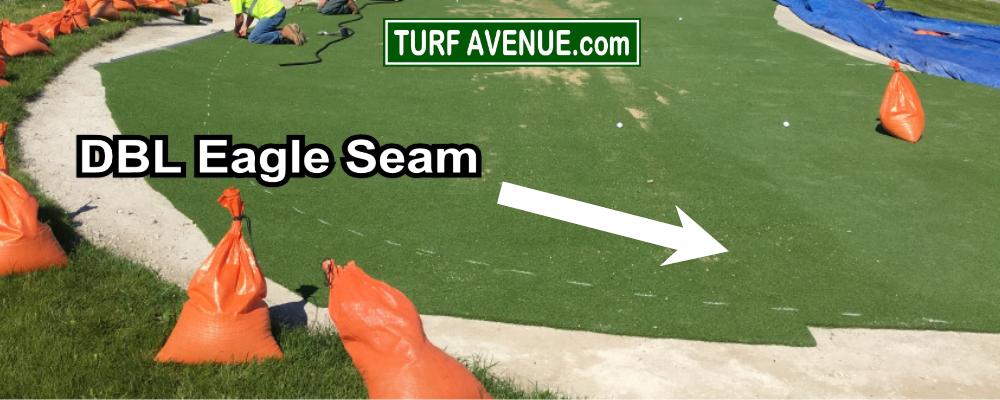
The seaming techniques
create an invisible seam. You will need seaming tape strips and
commercial strength turf adhesive. A 1/4 in. notched trowel is
needed to spread the adhesive.
Make sure the grain of each roll
of putting green turf is running in the same direction. (roll them
out the same direction - side by side)
Place the green on the
edge of the sub base and roll it out.
Make certain there are no
creases in the turf or it will affect the roll of the ball. If there
are very small creases or bubbles don’t worry. When you infill the
putting green the small creases and bubbles will go away with the
weight of the infill.
With a coarse broom, sweep the fibers from
the center of the putting green out allowing all looseness to be
pushed to the outside.
Note: See Seam Adhesive Instructions Below
Please Call With Any Questions That You Might Have...
(573)475-9547
![]()
Step 10:
Cut The Rolls And Scrim
Removal...

Notice the black strip running the length of each roll. This is mill
scrim and it will need to be removed.
Take a chalk line and snap
a line the entire length of the turf so you have removed the factory
scrim. Use a piece of handle iron or a straight edge to use as a
guide for your cut.Use a utility knife or a carpet knife For best
results.
Repeat this process for the a adjacent roll.
 NOTE: Seam Tape Is Laid With The Shiny Side Down.
Proceed
with a dry fit!! Position one side halfway over your seam tape. And
then tack it down temporary Using 16 penny nails.Note: do not drive
these home because you will be removing them to apply your glue.
Lay the other side down and kick it (with a carpet knee kickeras) as
close as possible to the side that you have tacked down.
Lay one
roll over where the seam will come together so the black backing is
facing up.
After the seam has been cut, join the two pieces
together to ensure a tight fit before gluing the rolls together in
step 12.
Remember: Continue to replace your utility knife blade
after cutting eight to ten feet in length. The goal is to cut
through the turf and not rip through it.
Note: See Seam Adhesive Instructions Below
![]()
Step 11:
Add Seaming Tape and Adhesive...
Hint: There should an equal amount of turf
on each side of the seam.
Spread the adhesive over the entire
surface of the black strip. Make sure the thickness of the adhesive
is no more than 1/4 inch.
Allow 10 to 15 minutes for the adhesive
to set up and get sticky before seaming.
Lay each piece of the
putting green turf over at the seam.
Note: See Seam Adhesive Instructions Below
![]()
Step 12:
Join Rolls Together (part2)...
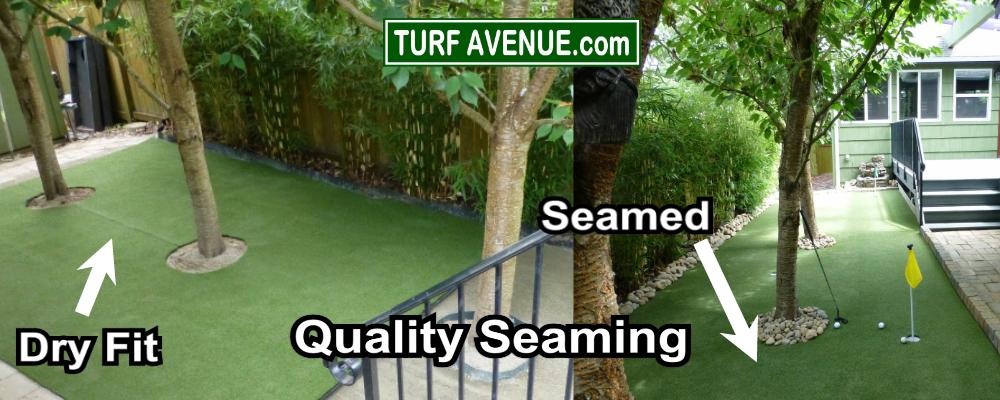
Starting at one end of one roll, lay one roll onto the adhesive
and seaming tape the full length of the seam.
Lay the second
roll over as you join the two rolls together.
Press the seam in
place as you go applying pressure to ensure good contact of the turf
backing and the adhesive.
Once the entire seam has been placed
together walk several times over the area that has been seamed.
Allow an hour before starting the infill process.
Note: See Seam Adhesive Instructions Below
Please Call With Any Questions That You Might Have... (573)475-9547
![]()
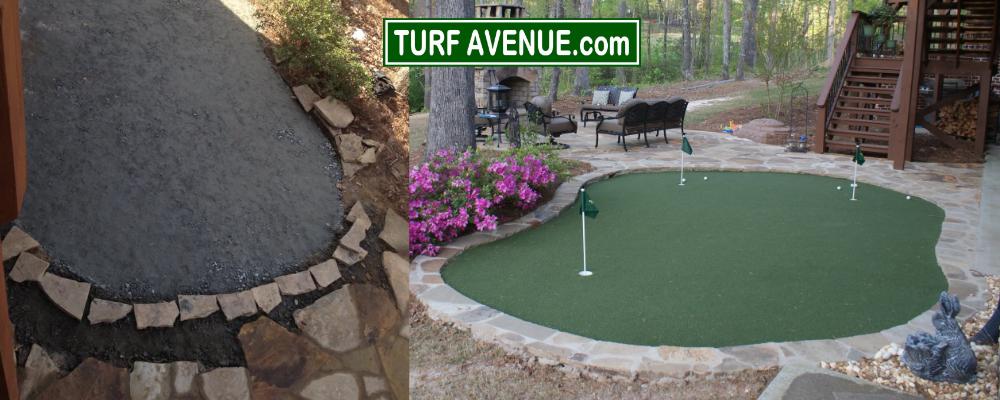
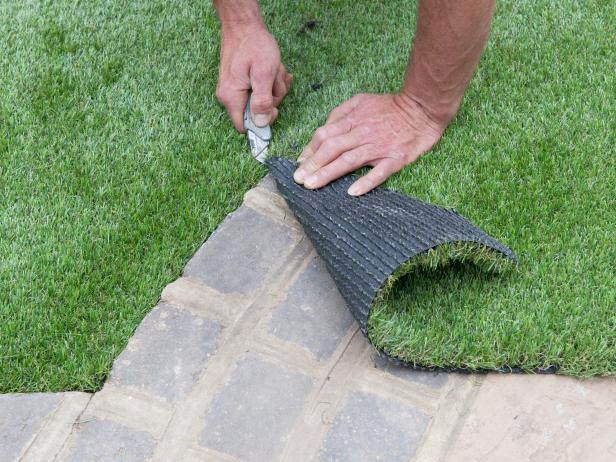
Step 13:
Shape Your Green...
 Do
Not Cut Out Cups Until You Are Done!!!
Do
Not Cut Out Cups Until You Are Done!!!
If you have no edging
to run your putting green up against or if you're going to add
friends. Using a piece of chalk draw your shape, then stand back and
look at it prior to cutting.
The green is delivered in a
rectangular shape. You may desire to shape the green to give it a
natural look. Refer to your brochure for shapes.
If you are not
adding a fringe turf to your putting green, cut the shape of your
putting green using your outside border as a guide. If you desire a
fringe around your putting green, use a yard stick to assist you
with measurements.
For Example - On one installation we used a
two foot collar of fringe turf around the putting green.
Remember: The fringe turf is functional-- you can chip off of it.
Formula to determine the amount of fringe turf needed for a two foot
collar of fringe:
Total length + width Divide by 2.5
Example:
On a 30 X 26 putting green the length is 52 feet if you place the
two 15 by 26 rolls end to end.
52 + the width of 15 = 67
67
divided by 2.5 is about 27
A 15 X 27 foot roll of fringe turf is
needed to give a 2 ft collar of fringe around the putting green.
Use your yard-stick to measure two feet in from the border.
Use a
string to mark your shape in 1 foot increments.
Use a utility
knife (with new blades) to cut along the outside perimeter of the
string. This gives you the desired shape.
![]()
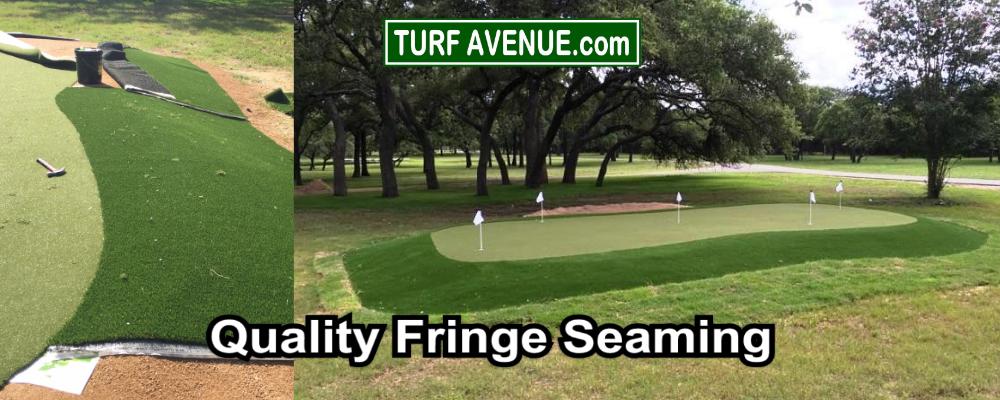
Step 14:
Add
The Fringe Turf...
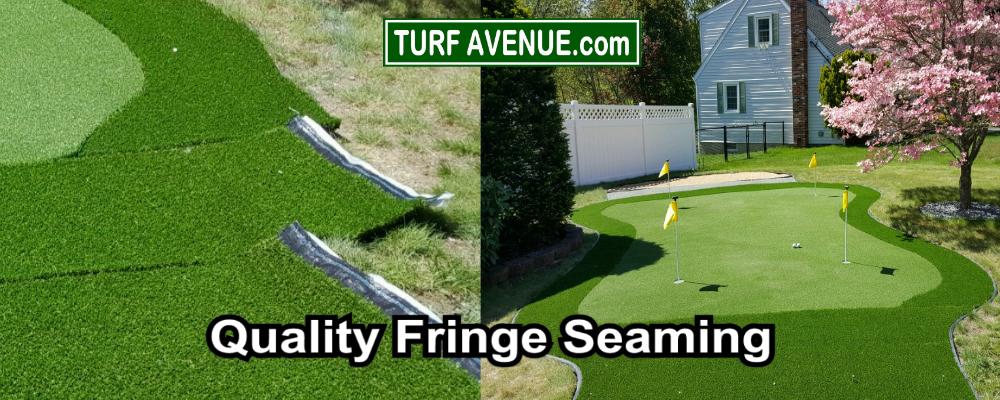
Cut the fringe material from the back - when possible cut between
two rows of stitching...
To maximize your fringe and minimize
waste- Run the fringe turf the length of the putting green on each
side first, then the two widths.
Hint: The grain of the fringe
turf must run the same direction all around the green.
Roll out
the fringe turf over one side the length of the shaped putting
green.
Overlap the entire roll of fringe turf just enough to
cover the shape of your putting green on one side the length of your
putting green.
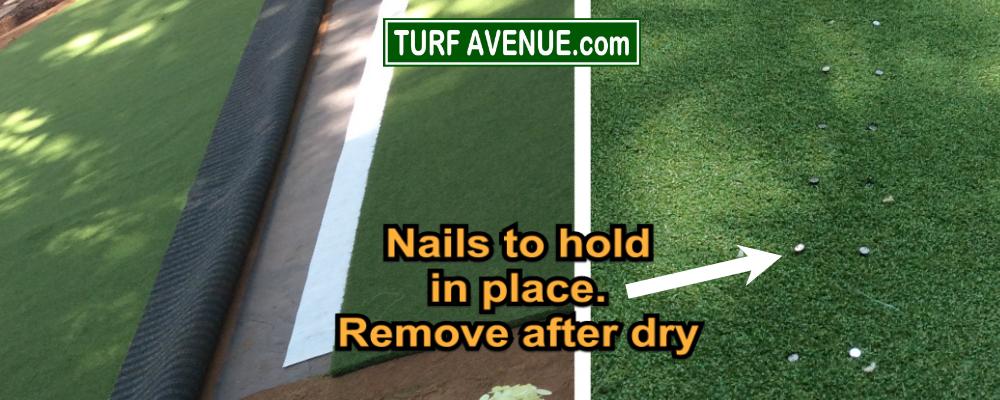
Note: Do this step after infilling green Step 15:
Nail down the
fringe into the sub base using 4 inch galvanized nails with small
heads 2 inches out into the fringe from where the seam of the
putting green turf and fringe turf will meet.
Place the nails
every six inches the entire length of your fringe turf.
Hint:
Nailing between the rows of stitching will hide the nails
Next,
come out 1 foot into the fringe turf.
Nail down the fringe turf
1 inch out into the fringe every six inches the entire length of the
fringe. Nailing the fringe at both the seam and a foot out from the
seam will anchor and secure the fringe turf in place and make for a
very tight fit.
Continue to do this for the entire perimeter of
fringe turf.
Cut along the outside perimeter where the fringe
meets your border.
Hint: Replace the blade on your utility knife
every 8 to 10 feet of turf you cut to avoid dulling a blade and
producing a ragged cut. Try to avoid “ripping” the turf.
Note: See Seam Adhesive Instructions Below
Please Call With Any Questions That You Might Have... (573)475-9547
![]()
Step 15:
Infill The
Green...

Do not cut out your cups until you are done sanding! Cutting the Holes is the last step that you do!
Infill Material: "Surger Sand" Fine, Dry
“clean” (no dust) sand 30/60 grit, some call it fine or “000”.
Sand
blasting sand works well and can be found in most locations. Also
look for pool filter sand, but it has to be dry so it will go
through the drop spreader.
1. Quikrete® Commercial grade sand
Fine No.1961
2. Black Diamond Fine
3. #30 - #60 grit
11/16" EAGLE III
(EGP50) 1.5 to 2 LBS. per sq. ft.
1/2" ACTION PUTT RiNo (12NPU) 1 to 2 LBS. per sq. ft.
3/4" ACTION PUTT RiNo
(34NPU) 2 to 3 per sq. ft.
Some sandblasting suppliers have black
diamond and you can use it as a top dressing. 2 lbs. silica and the
last .5 to 1 lb. black diamond.
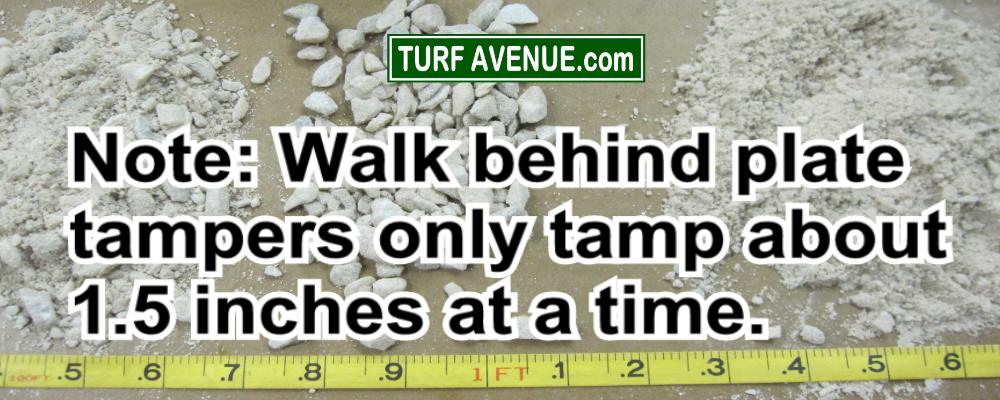
Note: You can also run the plate
tamper across the green to help vibrate the sand in.
Hint: The
putting green and infill Must stay dry during this filling process.
If the infill or putting green gets wet the infill clumps
together, not allowing the infill to get between the fibers of the
putting green and be properly filled.
Fill the drop spreader 1/2
full with the infill.
Spread it across the top of the green.
Hint: The weight of the infill will flatten any small bubbles you
may have on your green. Do not apply too much infill at any one time
without first brushing the infill into the fibers.
For example,
a good basic guideline is to use 100 pounds of infill over an entire
15 X 30 green between brushings.
Remember: Always brush from the center out to take out all air
pockets out from under green.
You must brush between all infill
spreading.
Once the green is half full, brush the putting green
using consistent force.
This infill procedure must be repeated
until you have filled the green completely full, close to the top.
HINT: You can't overfill the BentGrass green. This applies for
all 3 turf lengths..
Over-filling of the green ensures a
consistent level of infill across the entire putting green surface.
Please Call With Any Questions That You Might Have... (573)475-9547
![]()
Putting Green Installation Infill The Fringe...
By infilling the fringe turf the fibers will stick straight up or
vertical. You only need to fill the fringe turf half full to achieve
this.
Use your broom to consistently brush against the grain of
the fringe. This gets the fibers to stand up.
Sweeping In Infill...
Always brush from the center out to take out all air pockets out from under green.
You must brush between all infill spreading.
Brush the excess off the putting green.
Sweep the green a second time to remove any excess infill. Your goal is to have 3/32 to 1/4 inch max of the putting green fiber exposed.
HINT: If the green appears blotchy in color note that the first rain will wash the infill dust off the fibers and settle the infill into the green.
![]()
Step 18:
Cut The Holes For Your Cups...
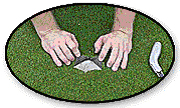
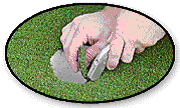
Locate the cup holes by pressing the turf with your hands until you
feel the holes.

Using a utility knife (with a brand new blade) cut the holes out of
the turf.
![]()
Step 19:
Roll The Turf - (Optional)...
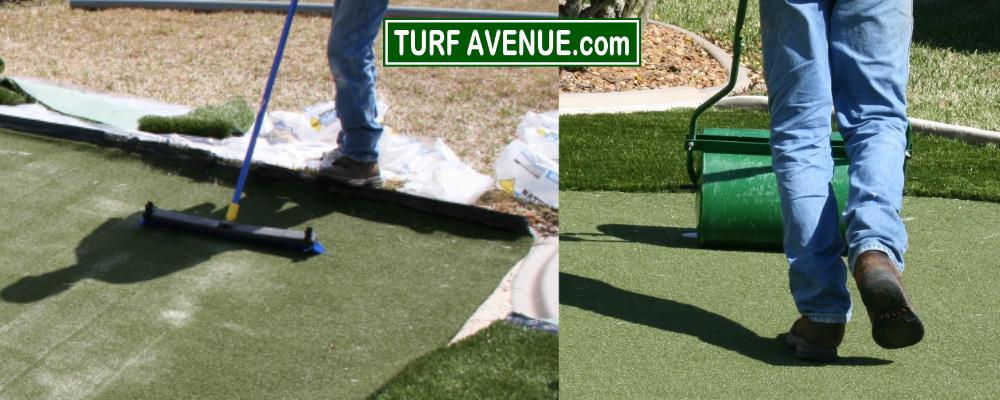
Rolling of the green will determine the speed of you putting
surface.
Using a water filled roller, roll the green the length &
width of the entire surface.
It will take several times both the
length and the width of the putting green to achieve the speed you
desire. Once you have done this you will not have to do it again in
the future.
![]()
HINT: When Trimming To Outside Edging
Continue to change out your blade often and use the edging to cut
against.
Continue to change out your blade often and use the edging to cut
against.
![]()
Seam Adhesive Instructions...
Our Turf Adhesive is an eco-friendly, single part,
moisture curing, polyurethane adhesive. It is designed specifically
for bonding various substrates to the backing of synthetic turf.
Substrates include: Road Base, Decomposed Granite,
Concrete, Asphalt, Wood and Foam Padding.
NOTE: Seam Tape Is Laid With The Shiny Side Down.
Directions:
1.
Application area should be clean and free of oil and debris.
2.
Apply Adhesive to seam tape or surface via trowel, spray rig, glue
box, or by pouring over the surface area.
3. Allow 5-7 minutes
wait time for adhesive to absorb surface and atmospheric moisture.
4. Lay down turf.
5. Wait 10-15 minutes (longer wait time
required under moist or humid conditions.)
6. Press seams
ensuring contact between both surfaces (weighted roller may be used
for field applications.)
7. After 25-35 minutes of cure time,
press or roll seams again, ensuring contact between both surfaces.
8. Begin brooming and infilling after 2-3 hours. The Turf Adhesive
will be fully cured after 24 hours.
Please Call With Any Questions That You Might Have... (573)475-9547
![]()
